|
|

|
Zundapp KS601 - Making The Battery Strap
|
| |
| |
Until just the last year or so, I never felt I could justify putting very much time into
working on the Zundapp. There were just too many other projects of higher priority. Still,
I wanted to ride it, at least a little.
Obviously, it needed a battery to ride it. I therefore purchased one, but there was nothing
to hold it in place. The parts list showed an odd strap like thing, but did not provide any
detail of how it was made, or even what it was made from. As a temporary, and very crude
field expedient, I just bent up a chunk of 3/4" x 1/8" cold rolled strap and held everything
in place with two lengths of 1/4-20 threaded rod. I considered it so temporary that I didn't
even file the saw marks off the ends. You know how that goes; rode with that unsightly piece
of shit holding my battery down for a number of years.
|
|
|
While it did effectively hold the battery in place, the "temporary" strap was as ugly as
hell. But, when I decided to attend the first annual North American Zundapp Rally held
at Kevin Johnson's beautiful farm in Spring Valley, Ohio, September of 2013, there
was no time to replace it.
Of all the things on the bike that needed improvement, this was the one I primarily
found myself wanting to make excuses about. So, as I cleaned the bike up for the
second annual Spring Valley meet, getting rid of that ugly-assed battery strap seemed
more important to me than just about anything else on the long list of things that
badly needed to be addressed.
At the first rally, I had seen the battery strap on Daniel Ayres' beautiful all original
'52 KS601. His brother, Joe, who had made the strap, was quite proud of it, understandably
so. I was determined to make something which, if not as nicely refined, was
|
|
|
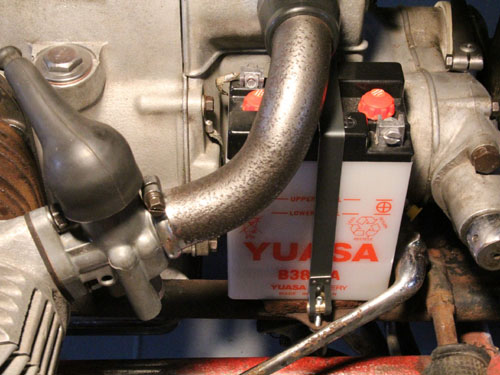
The Zundapp KS601 battery strap, first (and current) incarnation.
|
|
substantially of the same ilk. Unfortunately, hustling at full speed all the way to
the deadline on all the other parts of the bike, and realizing I wasn't going to get
the carbs properly cleaned up and reassembled in time and therefore wasn't going to
get to ride at the rally, it wasn't until the night before I had to leave that I was
able to start on the battery strap.
Let me briefly change the topic and direct your attention to the air intake tube,
in the picture above. I wish I had taken a detail shot of the tube prior to wire
wheeling the rust off of it so you could see the tremendous flaking and ugly
corrosion. After cleaning it up, I swear to you this is a surface finish I would
intentionally apply to old chrome if I knew how.
What were deeply pitted rust spots are now little islands af beautifully patinated
steel run through with veins of shining chrome. The texture is pure pleasure to
run your hand over. The handle bars, basically in the same as-found condition,
responded substantially the same to the wire wheel. Wouldn't change any of them
for the world! The picture totally fails to capture the effect.
Also, as an aside, what little you can see of the shifter and kick start lever
are basically in as found condition, just degreased in situ. Didn't have time to
pull them off and clean them up properly. Haven't figured out how to deal with
the frame yet, so it's pretty much as found.
|
|
Making The Battery Strap
|
|
|
|
|
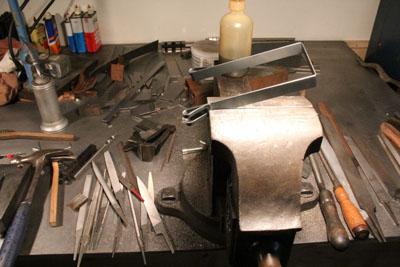
A glance at the vise end of the workbench. I wrested this beauty off a workbench in an
abandoned line shaft driven machine tool works with mine own hands. One can only guess
what this chunk of iron has seen over the hundred plus years it was bolted to that bench.
I used the same fasteners, old square head bolts and nuts, to mount it on mine. The vise
came from the tool maker's part of the factory and looked nearly unused, but that's
another story. Still haven't replaced my cabinets above it, after the lightening strike
fire. They took a good long time to build the first time. Kind of assumed that would be
the last time and just haven't had the spirit to tackle the job again. But so goes life.
Maybe I'll get them up this summer.
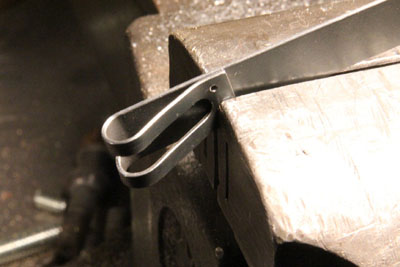
The image to the right shows the end of the battery strap drilled for the first "rivet."
The rivets, as you see below, are just chunks of 1/16" mild steel weld rod. Still, they
make remarkably strong fasteners. I need to make some rivet sets out of hardening tool
steel, something to form the heads a bit nicer.
I considered slotting the strap in the mill, but couldn't think of a quick and dirty
way to fixture it. Clamping it in the vise wouldn't work because it would close up as
the cutter removed supporting material, plus it would have dictated a wider band at the
edges of the slot to accommodate the step width in the vise. In the end, I just did
the time honored drill-a-bunch-of-holes, then file out the webs. It went far faster
than any conceivable mill set-up would have.
|
|
|
|
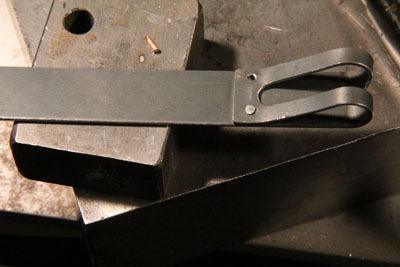
Above left you see one end with a rivet in place and another ready to go. I wrapped the
end around a shoulder bolt of the same diameter of the brass barrels I made to accept the
hold down screws. I expected the hot rolled 18 gauge to spring back a bit, but it hardly
did at all.
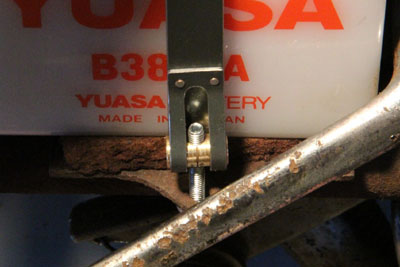
To the right, the strap in place. Screwed up the first brass barrel because I didn't have
the correct style metric tap. Thought I could get away with it in brass with a little
larger ID hole. Nope. So this is a temporary 10-32 version. I just prefer to keep it all
metric.
Note that the grotey looking thing under the battery appears to be a chunk of old Fir-tex
fiberboard or something of a similar species. Who knows how long it's been serving the
function.
I made the strap and threaded barrels in just a touch over two hours, wrapping it up at
5:00 pm the night before the rally. This attempt is really just exploring the basic idea.
I will replace it with a little more refined version, with at least some rubber padding,
both to give it a more conforming grip on the battery, and also hopefully to protect the
strap from the acid. I might consider using stainless and giving it a black oxide finish,
but for now, not too bad for a couple of hours of frantic work.
|
|
|
Last updated 11-16-17
Email:
mechanique at wmol dot com
|

|
|
|