|
|

|
Zundapp KS601 Refurbishment
|
| |
| |
Midway down this page
you will find pictorial links to various stages of resurecting my KS601. But first...
|
|
A Brief Introduction
|
|
The year is 2014 and at long last I've found the time to begin refurbishing my '57 Zundapp KS601.
I use the word refurbish intentionally. I do not very much care for restoration. I like the record
left by the passage of years. Preserving that patina will be a primary focus.
Also, I love to repair things. Repair, to me, is not replace. Anyone can do that. Repair is to take
as much of the original as possible, make replacement pieces for what cannot be re-used, then put
it all back together. I don't throw practicality to the wind. A repair has to be reliable long term,
but I buy new parts only as last resort. A repair has to be done with skill also, even if it means
doing it a couple of times. These days, however, I usually get a pretty good result on the first pass.
I've learned over the years to take it slow and thoughtful. You don't have to back up too much when
when you do it that way.
An immediate incentive was my desire to have the bike rideable in time for the second annual North
American Zundapp Rally held in Spring Valley, Ohio, September of 2014. I attended the first year and
had such a great time that I decided to get it running and get a brake light working on it so I could
join in on some rides.
As related elsewhere, the Zundapp was in pretty rough shape when I bought it from my friend Bill, the
wages of having mouldered in the barn of the guy Bill got it from for a couple of decades. Despite that,
it ran nicely and rode very well, everything working smooth and correct, except the clutch was a mutha
to pull and the throttle stayed where ever you put it.
The lightning strike fire in my shop didn't do anything to enhance it's appearance, or the function of
the throttle, as it turns out. My rule was nothing went back in the new shop without getting cleaned up
first, so soot removal was the first phase of refurbishment.
|
|
I had about a year and a half experience cleaning soot off all manner of stuff before starting on
the Zundapp, so I went at it as a seasoned pro, knowing just what it was going to take.
The only thing I had found that had any effect on the
fire soot was a super wicked industrial cleaner called Spartan SNB-130. At the minimum recommended
dilution, 8:1 with water, it would take off most paint if allowed to set for more than a minute or
so, but not necessarily soot. 4:1 was generally effective for soot, but hell on everything
else. At that concentration, a drop on bare skin burned slightly for a few seconds.
You always wear heavy gloves. Even a few minutes of direct exposure would leave your hands red and
splitting. Never spray it. It would leave you coughing for a day. Also, the stuff eats aluminum for
lunch and eventually chewed its way through every container I put it in, no matter the material,
except its original jug.
My Zündapp KS 601's fellow garage denizens.
|
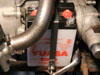
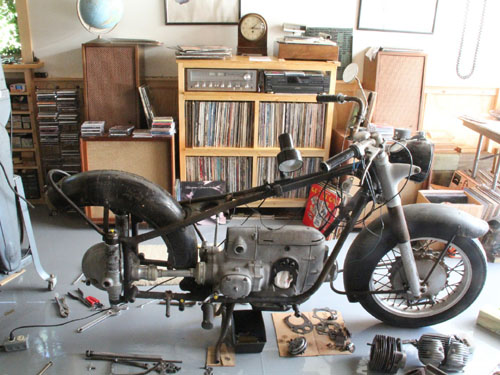 The Zundapp KS601 de-sooted, de-grunged, and going back together.
|
|
|
I had already cleaned up the Pratt Wasp Jr. radial that hangs on my wall. That was of similar
complexity with similar materials and nooks and crannies, so it made a good training exercise
prior to tackling the Zundapp. The radial only had to look Ok. The Zundapp has to work!
The second phase was a carefull piece by piece disassembly and inspection. My intent was to use
as much of the original equipment as possible, to assess what was ultimately going to need replacement,
and, primarily, to get it running. More involved mechanical work, if required, will be in the third
phase.
The image above was taken a little past midway through the effort. The mission experienced substantial
scope creep, one thing leading to another as they do. It also encountered some unexpected issues, like
the carbs being badly corroded by a dose of fire water that, under ideal circumstances, I should have
discovered a year or so ago. I ultimately failed to get the bike running in time, mainly due to the
carbs, but I got it looking absolutely beautiful, in my humble opinion.
|
|
A Photo Tour of the Zundapp Refurbishment
|
|
Click on the images below to go to a page detailing that part of my Zundapp KS601's refurbishment.
|
|
|
|
|
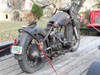
An initial look,
before and after...
|
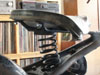
Straigtening the rear axle.
|
Repairing solo seat frame
and making mounting hardware.
|
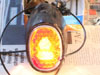
Refurbishing the tail light.
|
|
|

|
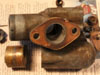
Rebuilding the
carburetors.
|
The battery strap.
|
Fixing the broken tool
box hinge.
|
|
A Word Or Two Regarding Patina
|
|
You have to understand that I am a great admirer of patina. I am not joking here. I'll
take used over new any day. I like the dust jackets on my many (many) books to be just a little
tattered. I like my tools to have the patina that comes from the previous owner neglecting them,
letting them rust to just the right degree.
The majority of my tools, beyond the core set of sockets and wrenches that I've had for decades, have
come from garage sales. I have the right tool for nearly every job, and generally got them cheap. Part
of that is to recognize the good tool under the layer of rust, and also, to recognize the bad; pitted
by rust or edges chipped or rounded. I am blown away by how people totally neglect their tools, then
struggle with them when they need them, damaging what they work on and, ultimately, tossing the tool
and buying another, only to repeat the process.
|
|
I spend a buck on a twenty dollar tool that others have determined is junk, then disassemble it
and hunker down in front of my fabulous Baldor powered wire wheel, one of my favorite and most
used tools, and one of the few things I have bought new. I knock all the crud off the
surface and buff the patina down just perfect; remove all the rust but don't touch that beautiful
layer of dark oxide, the product of decades passing in an old tool box, waiting to be revealed.
Then I carefully oil the tool with gear oil, just the lightest layer. Reassemble it, oiling all
the load bearing or sliding contact surfaces. When I'm done, I have a tool with a deep
lusterous blued or browned surface - something that speaks of time having passed - that moves
smooth as silk and holds its finish for years.
My vice grips don't click, they just smoothly cam to a lock, with considerably more force at the
jaw then the same effort on the handles would get you with a poorly maintained pair. The screws
move without resistance and the jaws release with a gentle press. My C-clamps and pipe clamps -
of which I have many, virtually all of them for a buck or two at garage sales and rusted
to the point of being frozen - adjust effortlessly and clamp like a vice, their screws always
oiled just right. My ratchets, pliers, pipe and monkey wrenches, spring compressors, are all an
active pleasure to use, and to look at. Everytime I pick them up, a part of me ponders their
history, because they so clearly have stories to tell that predate me, unlike some soulless
brand new laser marked chromium tool.
|
 My beautiful Baldor buffing machine with wire wheels.
3/4 horse, 1800 RPM, no fooling around.
|
|
|
Now, I've got to pause and confess that not everything is better with patina. The Mercedes in the
background of the Baldor picture, above, does not yet have any patina, despite being a '99, and that's
really the way I'd like it to stay forever. Fat chance in Michigan. My WM300 Power Wagon, on the flip
side, has rare and incredible patina and my concern is retaining and preserving it just that way.
All of this is to invite you to look at and consider the Zundapp refurbishment through my eyes. At the
first Zundapp rally in 2013, people kind of smiled indulgently when I told them I wanted to preserve
the patina of this KS601. I didn't get any of that this year. Even those who clearly preferred their
bikes with blemish free shimmering paint jobs and glistening chrome, even they could see just a glimmer
of what I see in patina, and were genuinely interested in what I had in mind for specific parts, like
the fuel tank and the frame. I've got a lot of work to do yet, but you'll get an idea of where I'm headed
from what I've done so far.
|
|
Last updated 01-16-18
Email:
mechanique at wmol dot com
|

|
|
|